Summary:
- Bleed ensures no white space appears when designs are printed and trimmed. Margins prevent crucial content from being too close to the edge where they can be cut off during printing.
- Use the Little Rock Printing™ Canva template that matches the product you want to print. Ensure the dimensions correspond to the desired final print size without the bleed.
- Canva includes a standard 1/8″ bleed. To view it, navigate to File > View Settings and select “Show print bleed.” Make sure backgrounds extend to this bleed to prevent white gaps.
- Canva’s margins can’t be adjusted, but they should be visible when you make your design. Access them via File > View Settings and choose “Show margins.” Ensure vital design components stay within these margins.
- Before downloading your design, inspect your design for errors, especially around bleeds and margins. When ready, download as a PDF Print file, ensure “Crop marks and bleed” is checked, and set the Color Profile to CMYK for accurate color representation in prints.
When it comes to preparing your designs for print, one of the key aspects to get right is the bleed and margins. Not giving this due attention can result in cut-off designs or undesired white space in your final printed piece.
Canva is a popular online graphic design tool that provides a straightforward way to account for these measurements. In this guide, we’ll show you the steps for properly working within the bleed and margins so the professional print products you create come out exactly as you want them to every time.
What Bleed & Margins Mean
Bleed
The bleed is an extra space added to the design that goes beyond the final print size. Sizing and positioning graphics and images to extend into the bleed area ensures that there’s no unwanted white space around the edges when your design is printed and trimmed.
Margins
Margins are the spaces around the content of your design. They ensure that important content like text or logos is not placed too close to the edge, where it might get cut off during printing.
Step 1: Create Your Design in Canva
Before you need to worry about bleed and margins, you’ll need to make sure you’re using the right kind of Canva template for the type of product you want to print. Check out all our Canva design guides here to find an appropriate starting point and step-by-step instructions.
Tip: Our templates for different print products are made with specific sizes in mind, but you’ll still want to double-check the canvas size to make sure it’s right for what you’re printing. Make sure your dimensions match the final print size you need, without the bleed. The bleed can be checked later.
See Also:
Step 2: Adjust the Bleed
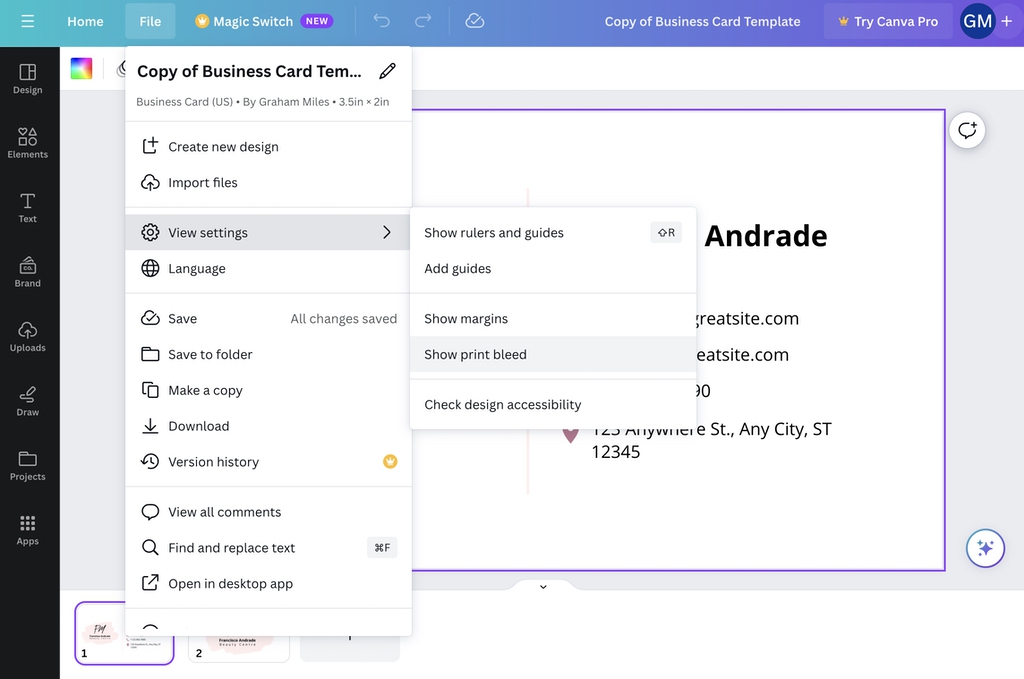
Canva automatically includes a standard bleed size when you download print-ready designs. This standard bleed is 1/8″ on each side of the canvas, and cannot be adjusted. Instead, you’ll want to make sure the bleed is visible on your canvas so that you can stretch your background over it while keeping the rest of your design inside it. To do that, just follow these steps:
- In Canva, click File.
- In the File menu, click View Settings.
- Click the option marked Show print bleed.
- The bleed will appear around your design as a dotted line.

Via Canva.
Once your design is complete, stretch the background so that there are no white gaps between your content and this dotted line.
Step 3: Setting Margins in Your Design
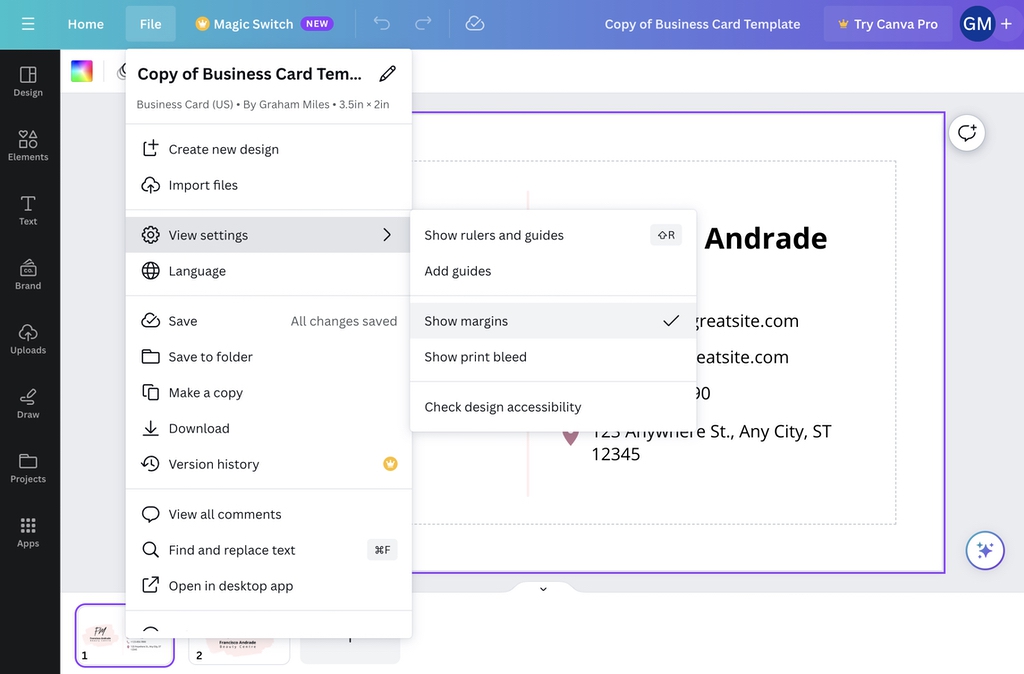
Canva’s margins, like bleed marks, cannot be adjusted manually. However, you’ll still want to make them visible when you’re creating your design so that you aren’t placing content elements in areas where they could be cut off. To do this:
- In Canva, click File.
- In the File menu, click View Settings.
- Click the option marked Show margins.
- The margins will appear on your canvas as a dotted line.
Make sure all important design elements are inside these margins to prevent them from being cut off when we print it.
Step 4: Review & Export Your Design
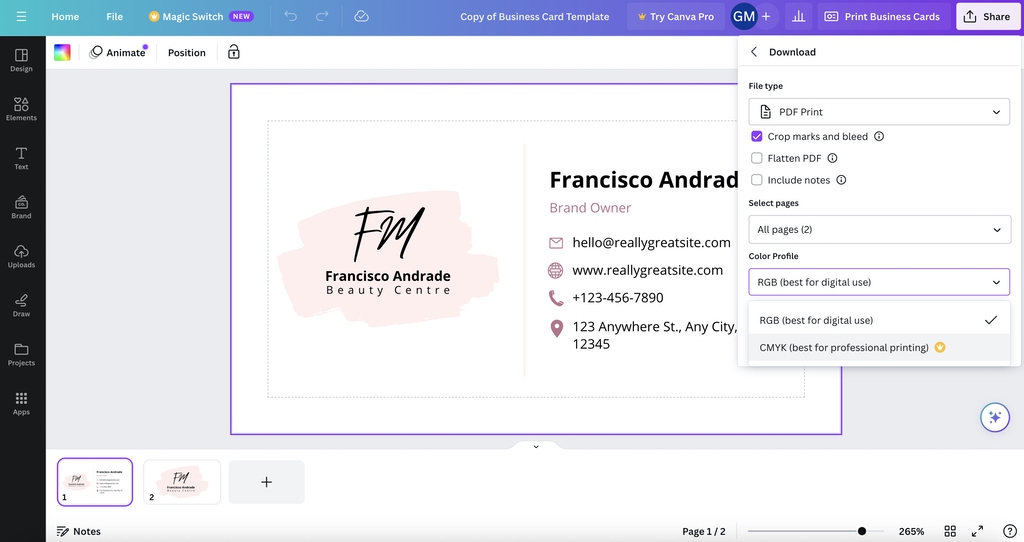
Before downloading your final design:
- Zoom in and review your design. Ensure no critical elements sit on or outside the bleed area or your set margins.
- Click Download, choose the PDF Print option, and check the box marked Crop marks and bleed.
- Select CMYK from the Color Profile menu so that your design’s colors show up properly when printed.
- Download your design and provide it to us when you place your order.
Small Details Make for Perfect Prints
Adjusting bleed and margins in Canva is an essential step for achieving professional print results. By ensuring your designs account for these measurements, you can confidently hand over your files for printing with the knowledge that the final product will meet your expectations.
Use what you’ve learned above to make working with bleed and margins in Canva a breeze. For more information, contact Little Rock Printing™ or browse the FAQ below.
Frequently Asked Questions about Bleed & Margins
How are bleed and margins different?
Bleed is used to prevent accidental gaps of white space when you want your design to print all the way to the edge of your print material. Margins are there to ensure that important elements of your design have a safe area around them so that they are not cut off when printed.
What content should go all the way to the bleed and what content should stay in the margins?
For most designs, only your background should extend all the way to the bleed, as this will prevent your product from printing with white space around it. Nearly all other design elements should be placed within the margins to ensure that they are printed fully on the final product.
Why can’t I adjust my bleed and margins in Canva?
As long as your design is the correct size for the product you’re going to print, you shouldn’t need to adjust the bleed or margins. However, you can adjust your design size if you have a Canva Pro account by following these steps:
- In Canva, click Resize in the menu bar.
- Choose Custom Size from the options that appear.
- Put in the height and width values you want your design to have.
- Click Resize to change the canvas, or Copy and resize to make a duplicate with the new design size.
Do I need to manually account for bleed and margins when I design in Canva?
No—if you’re using bleeds and margins in Canva, your canvas will automatically account for these values so that the final print-ready design is the right size.