Summary:
- A great way to customize a printed calendar for your business is by adding your own photography.
- Little Rock offers free Canva templates so you can create a custom printed calendar in just a few easy steps.
- Simply choose your calendar template, replace the stock images with your own images, update the text as needed and download the calendar as a PDF Print.
- When you’re finished with your calendar design in Canva, submit your files to Little Rock for professional printing. We offer a free sample paper kit and a free proof before you submit your full order.
Using your own photography on a custom wall calendar is a great way to add a personalized touch to your print product. It may seem daunting to build a custom calendar from scratch, but with the right tools you’ll be able to create and design a calendar in no time.
We can help! Little Rock offers free Canva templates that you can use to customize a one-of-a-kind calendar. In a few easy steps, you’ll be ready to submit your calendar for printing and then easily distribute it to customers, potential clients or your employees. Check out our guide on how to design a custom calendar using your own photography.
See Also:
- Using Canva to Design Your Own Calendar
- Every Date You Need to Include When Printing a Custom Calendar in Canada
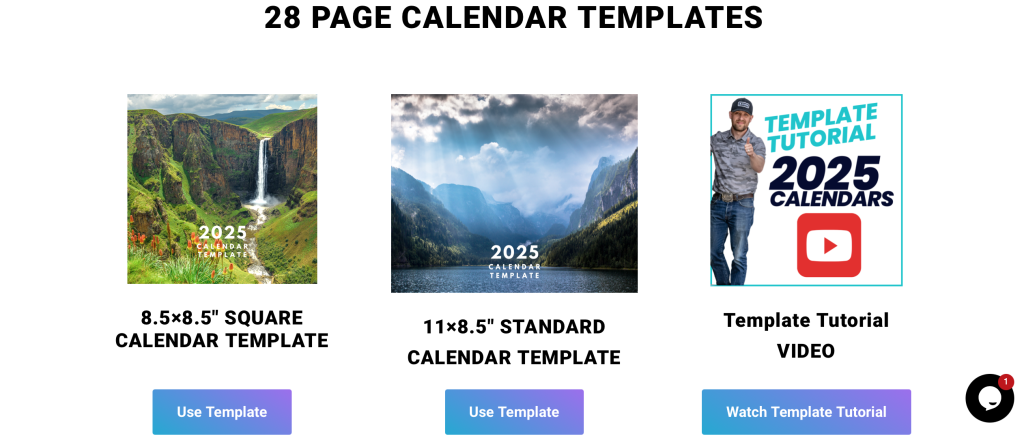
Step 1: Choose Your Little Rock Calendar Template
The first thing you’ll want to do is select a calendar template from our website. Here’s a quick link that will take you to all the templates we offer. Each template was created in Canva, a FREE design resource, to help you design some of our most common print products.
There are two calendar templates to choose from: a 28-page 8.5×8.5” square calendar and a 11×8.5” standard calendar. We also offer a 32-page calendar on our checkout page, you’ll just need to add a few pages to the Canva template. Click on the one you want and then “Use Template”. You’ll need to login or create a Canva account.
Step 2: Replace Stock Images With Your Photography
Before you start working in your Canva template, make sure all of your photos are saved to a folder on your computer desktop. This will save you time during this next step. Also, make sure that you’re using hi-res images for the highest-quality print possible.
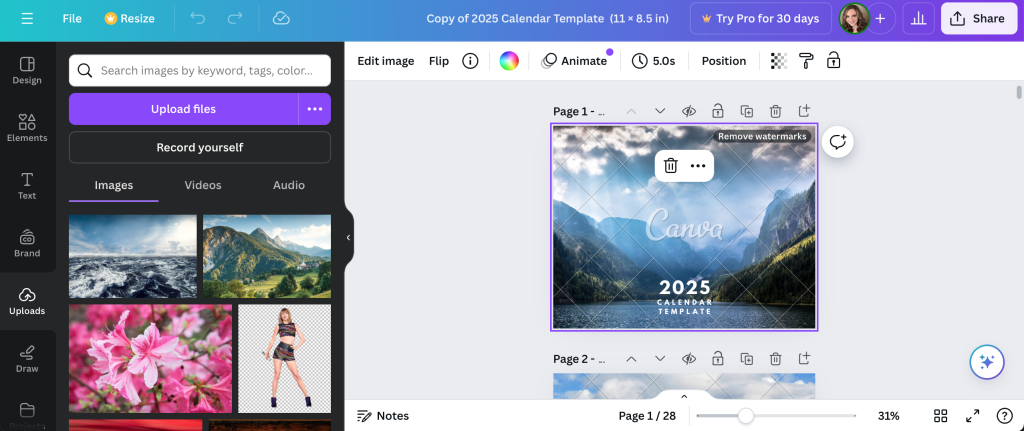
Now that you’ve selected your template, you can start editing the photos and the text. The template includes the cover page with an image and calendar name and all of the months and dates for the calendar year. Let’s start with replacing the photography—you’ll want to replace the stock photos on each page with your own photography. To do that, simply:
- Click on the template image. Right-click to select “Detach image from background” and delete the old image.
- To upload your photos, go to “File”, “Import Files” and “Choose Files”. This is where you’ll go to the folder on your desktop with all of your images saved so you can upload multiple photos at once.
- After your photos are uploaded to Canva, choose the new image you want to use in the template and double click so it loads into the template. Right-click and select “Set image as background” to fill the template space.
If you want to use more than one photo for each page as a collage, you won’t set the image as a background. Instead, you can upload multiple photos and resize them by dragging the corners/edges of the photos to fill the template space. You can also go to “Elements” on the far left side and “Frames”. Select a frame and then drag the photo into the frame and it will automatically scale it.
Repeat the image process for each page until all of the pages are filled with your original photos. If you don’t have enough of your own photos to cover the calendar, you can search for stock photos with your Canva Pro account. Simply click on “Photos” on the far left column and search for an image in the search bar.
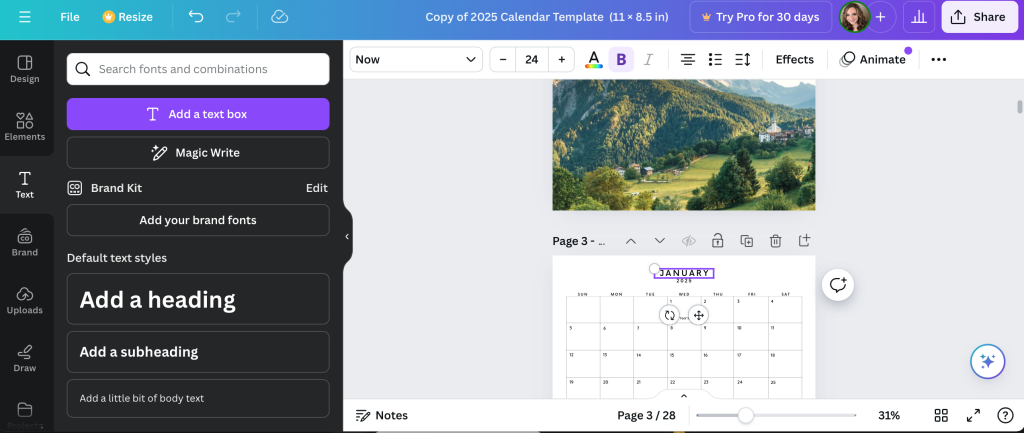
Step 3: Edit the Text on Your Calendar
Besides replacing the images, you can also edit the text on all of the calendar pages. To edit the text, click on the text box and replace the text with your own. You can do this with holidays, birthdays and other special dates and events. Our calendar template is Alberta-specific so it will also include any Alberta holidays, but you can edit these according to your needs.
You can also copy/paste text boxes of the same size and edit from there or add new text boxes. The fonts, font sizes and colors are also editable in Canva, so you can make a one-of-a-kind calendar.
Step 4: Save & Download Your Calendar
Once you’re done customizing your calendar, rename the file so that your project saves to your Canva account. You can always go back to this project and make any edits.
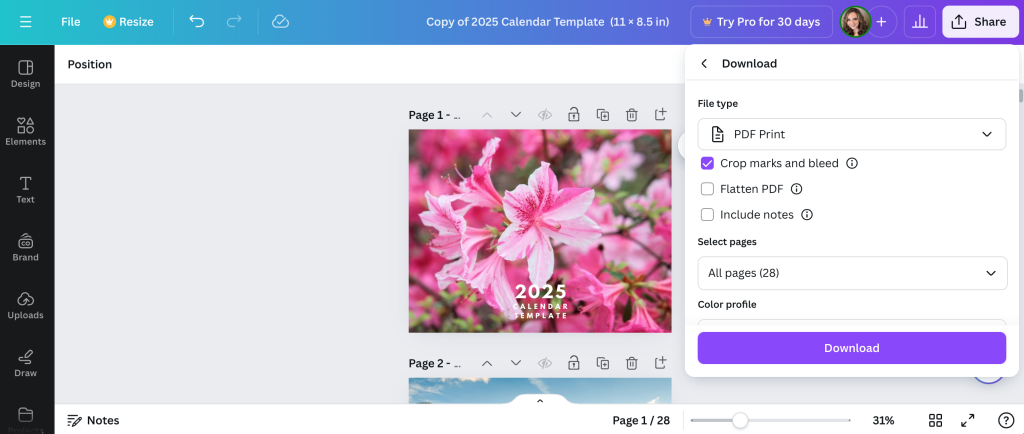
When you’re ready to download, follow these easy steps:
- Go to “Share” in the upper right corner.
- Select “Download” from the dropdown menu.
- Choose “PDF Print” under “File Type.”
- Include “Crop marks and bleeds.”
- Opt for “CMYK” under “Colour Profile.”
- Click the “Download” button to export as a PDF.
Your file will download as a print-friendly PDF that you can save to your desktop or a special folder. It’s good to open up the PDF once it’s downloaded to make sure you’re happy with the final product. Now you’re ready to order your calendar!

Step 5: Order Your Calendar Through Little Rock
To place your order, go to the Little Rock calendar page. We have a variety of customizations to choose from. There are two binding options: saddle-stitch bound or metal wire-O binding—both come with a hole drilled for wall hanging. You’ll enter the width and height of the template you selected (either 8.5×8.5” or 11×8.5”) and select 28 or 32 pages. You’ll also be able to choose from 3 cover paper types and 4 inside booklet paper types. Then, select your delivery method and timeline and add to cart to check out.
If you’re not sure what type of paper you want to use for your calendar, order a free paper sample kit from us—this includes small portions of all the materials we offer. You can also request a free proof of your calendar by using the code “FREEPROOF” at checkout. This way, you can verify that everything is right before ordering more calendars.
Choose Little Rock Printing For All Your Printing Needs
At Little Rock, we want to make sure you have the highest quality product possible—whether it’s a custom calendar, business cards, posters and everything in between. We want to be your print provider for all your business or personal needs. If you have any questions or concerns about your specific order, contact the Little Rock Printing experts here.